Thursday, January 22, 2015

Open Faced Italian Turkey Burgers


This is one of my families favorite recipes. These burgers are super juicy and flavorful, and are complemented greatly by the spaghetti sauce and cheese on top. Not only are these burgers absolutely mouthwatering, they are also very easy and quick to make. I use ground turkey for this recipe instead of hamburger, because I think that the turkey brings out the flavor in the Italian seasonings and turkey also contains a higher amount of protein.

Open Faced Italian Turkey Burgers

 
Makes about 4 servings 
 

What You Need:

Ingredients
    • 1 lb ground turkey burger
    • 1 egg
    • 1/4 cup bread crumbs
    • 1/4 cup grated mozzarella cheese
    • 1 table spoon minced garlic
    • 1 teaspoon parsley
    • 1 teaspoon oregano
    • 1/2 teaspoon salt
    • 1/4 jar of spaghetti sauce
    • 4 slices of bread of choice
    • extra mozzarella cheese for the top
 

Instructions:

  1. Combine ingredients. In a medium sized bowl combine; turkey, bread crumbs, egg, mozzarella, garlic, oregano, parsley, and salt. I like to hand mix them together until well combined. Form into four 1/4 oz burgers patties
  2. Grill burgers. In a preheated grill, place patties onto the grill and cook for about 5-7 minutes on each side or until no longer pink. I like to use my George Foreman grill for this in the winter on medium heat. While the burgers are cooking, heat up your spaghetti sauce and go ahead and either grill or toast the bread. I like to butter the toasted bread with a mixture of butter and garlic salt.
  3. Assemble. Place cooked burger on the toasted slice of bread. Top with some spaghetti sauce and finally some mozzarella cheese.
  4. Serve and Enjoy!

Monday, January 19, 2015

Keeping the spark alive


My husband and I have been married for eight and a half years and we have been together for over ten. We were high school sweethearts and everyone expected our love to fail. Even when we decided to get married, most people thought it was because I had to be pregnant. Which was not the case at all. We wanted to be one, for we both felt as though we found the other half of ourselves in each other. Like all couples we have had our fair share of ups and downs and twists and turns along the way. However, through all of the challenges that we have faced, our relationship is as strong and passionate as ever. This is because it is built upon a firm foundation of love, friendship, and trust, as well as our commitment to try to each put forth 100% effort into the relationship. That way if either of us falters, the other can pick up the slack. I have been asked if our love has begun to fade after all of this time and after having three children, and my answer is no. I feel as though I fall more in love with my husband each and every day. However, the love is different, it has matured and blossomed from the young puppy dog love we had at first. It is as though the love has grown up and matured with us.  I have compiled a list of tips that have helped keep our relationship strong and thriving.


  1. Treat each other with respect. It is essential that no matter what the circumstances that you both treat one another with respect. This doesn't mean that you have to agree with one another all of the time. It just means that, even despite an argument or disagreement, you do not belittle or attack the other person. You can disagree and can argue your point without making the other person feel bad about themselves.
  2. Make the other person a priority.  I know that this sounds much easier said than done, especially once you have children. However, it is so very important that you find time to spend with your partner. I try to include my husband in tasks that I have to do. For instance, when I am nursing my son, I try to sit as close to him as possible and start up a conversation. When we can, we also try to cook dinner together and do dishes with each other. We also try to make the most out of the time we get once the kiddos go to bed. I also always make sure to greet my husband when he comes home from work and I ask all about his day. I think it is so important that no matter how busy I maybe, that he knows how much he means to me.
  3. Date nights. It is so important to have one on one time with each other. It gives you both a break from the burdens of life, and gives you time to rekindle the spark and romance that can be smothered by all of the dirty diapers. It is time to just have fun and let loose with the one you love. An opportunity to be reminded why you fell in love in the first place. Dates don't have to be expensive or elaborate, you don't even have to leave the house. All you really need is one another. 
  4. Keeping the relationship positive. So many negative things happen in the world around us, it can feel as though the negativity will consume our lives. It is essential that we try to see our spouse in the most positive light as possible. Nobody is perfect and we all make mistakes. Your spouse may not do everything the way you would like them to.  However, instead of focusing on what they do wrong, try to instead focus on what they do right. That way when you think of your spouse you will have a positive impression of them.
  5. Let it go. Conflicts are inevitable, sometime in your relationship, you are going to disagree about something. You will feel angry and your feelings will get hurt.  It is important to talk through your problems and come to a solution. Once the solution is reached, you have to let go of all of those negative feels. It is time to forgive and forget. Holding on to these negative feels only breeds more negativity. Which can cause problems and rifts to form in your relationship. Also, never go to bed angry, as this lets negative feelings fester. 
  6. Intimacy is Key. One of the most important aspects of our relationship is intimacy. Humans need to feel loved and wanted. It is just apart of who we are. Intimacy takes many forms, from showing each other affection by kissing and cuddling, giving one another loving message, listening contently to what the other person has to say, and enjoying a healthy sex life. No matter how tired you are, you have to find time for these things. Your partner has emotional and physical needs that have to be met. There are many times that I am so tired, I can barely hold up my head, let alone feel as though I can dedicate energy to being intimate with my husband. However, once I feel the warmth of his lips on mine, all of my exhaustion begins to melt away. The troubles of the world fade into the background, the only thing left is the love I feel between us. 


Tuesday, January 13, 2015

Healthier French Toast Rollups


Breakfast has always been one of my favorite meals of the day. I believe that by eating a good breakfast it sets you up for the whole day. These french toast roll-ups are great for satisfying your morning sweet-tooth and won't leave you feeling guilty or weighted down afterwards. I filled my roll-ups with bananas and cream cheese, however you can use whatever filling you would like. I also think that almond butter and some dark chocolate chips would be amazing. Have fun experimenting and trying new flavors and combinations with this simple recipe.

Healthier French Toast Roll-Ups 

Makes about 8 servings

What You Need:

Ingredients
    • 8 slices of wheat bread (or bread of your choice)
    • 2 eggs
    • 2 tablespoons milk of choice (I use almond milk)
    • 1/4 teaspoon vanilla abstract
    • 1/2 cinnamon 
    • 1/2 banana cut into small pieces (or other fresh fruit of choice)
    • 2 oz cream cheese softened
    • coconut oil or butter to coat the skillet

Instructions:

  1. Remove bread crusts.  Cut the around the edge of the bread to remove the crusts. Roll the slices of bread with a rolling pin to flatten them. 
  2. Combine the cream cheese and bananas. Add the banana or fruit slices to the cream cheese. Stir until evenly combined. Filling will have a nice banana flavor, adding sweetness to the cream cheese
  3. Spread filling onto the bread.  Take a small amount of the filling and spread over the center of the bread. Roll the bread.
  4. Heat Skillet. Start to heat the skillet over medium heat and melt the coconut oil or the butter.
  5. Beat eggs and milk. In a separate bowl beat eggs and milk together until well combined, stir in the vanilla and cinnamon,
  6. Dip the rolls into the egg mix. Carefully dip the rolls into the egg mixture, letting the excess drip off. Place into the warmed skillet with the seem of the roll facing down. Cook and turn the rolls until it is lightly browned all the way around. Place on plate and if you desire sprinkle with a little bit of powdered sugar. 
  7. Serve and Enjoy!

Sunday, January 11, 2015

Date Nights under $20

Spending alone time with your significant other is essential for maintaining a close and connected relationship.You need that time away from all of the hustle and bustle of life, to just unwind and reconnect with one another. Sometimes it can seem impossible to fit a date into the budget. At least that has been the case for my husband and I. In the past a date consisted of a dinner at a nice restaurant and or going out to the movies. These dates can get expensive fast, making them far and few in between.  I noticed a strain on our relationship, that we were slowly drifting apart. We were both so tired and worn, that we frequently bumping heads. That was when we both decided that things needed to change, that we had to start making some time for us. My husband and I started  to spend time more together in the evening. He is now my weight lifting and workout partner and we enjoy watching a few shows on the TV together before we go to bed. However, it is rare that we do not get interrupted by one of our little boy who is out of bed with some sort of nightly request. We also made date night a priority. I have included three different date ideas that my husband and I really enjoy, and we don't go over budget , in fact, we spend less than $20. 

Going out for Dessert instead of Dinner


One thing that Anthony and I really enjoy is to go out to a restaurant for dessert, instead of dinner. We will usually enjoy a healthy dinner at home with our children, then go out and treat ourselves to some delicious desert. There is something that is so romantic about staring into one another's eyes, while sharing a decadent slice of cheesecake. We usually just share one desert, however sometime we each get a dessert and share them with each other. I like that you still get the quite environment of going to a restaurant, without the long wait for your entree, and without spending and arm and a leg. I think this date is truly a wonderful little treat for two very busy and hard working parents. 


Playing at the Arcade or Bowling Night


My husband and I love to play at the arcade. We have a blast playing ski ball, air hockey, shooting hoops, and getting to save the world from invading aliens. In the past we have spent only $10 and we got to play for a solid hour. Another bonus, is if you earn tickets, you can bring home a small prize for the kiddos. We also really enjoy going to the bowling alley for a game or two. Both of these activities are great because you get to go have fun and laugh with one another and just really let loose. This is great opportunity to let your inner child shine through for an evening. 


Daytime Picnic or Moonlight Hike


To me there is nothing more romantic than walking hand in hand experiencing the beauty of nature together. I just love when we are able to pack a picnic and either go to the park or hike one of our favorite trails. My husband and I have done this both in the warmth of the day and during the calm tranquility of the night. If you want to add an even more romantic flare, you can pack some wine and tea light candles. This is one of my favorite and most intimate dates and it only costs the gas it takes to get there.


Thursday, January 8, 2015

Easy Chicken and Rice soup


The weather here in Colorado Springs has been very cold and snowy. This week I even saw the temperature down to -8 degrees Fahrenheit.  Cold weather has always had a way of putting me in the mood for soup. One of my oldest son's favorite soup in chicken and rice. I love to make this soup for him, however it can be pretty time consuming. As a busy working mommy, time is not always a luxury I have allot of. So I decided to try and create my own recipe, that would still be yummy but also quick to prepare. Below is my quick take on the classic Chicken and Rice soup. 

Easy Chicken and Rice Soup 

Makes about 6 servings

What You Need:

Ingredients
    • 1-2 boneless skinless chicken breasts 
    • 1 cup instant rice
    • 1/2 tablespoons minced garlic
    • 1 1/2 cups chopped carrots (I use baby carrots for convenience)
    • 2-3 ribs of celery sliced
    • 1/2 teaspoons thyme (fresh or dried)
    • 1 teaspoons salt
    • dash of pepper
    • 1 bay-leaf
    • 1/2 tablespoons soy sauce
    • 2 tablespoons of all purpose flour
    • 3 cups chicken broth
    • 2 cups of water
    • 3 tablespoons of butter


Instructions:

  1. Cook the chicken.  Cut chicken into small cube like pieces, place in a large boiler with some avocado oil or olive oil. Cook until chicken is white and no longer pink in the centers. Remove from heat and remove chicken. Set chicken aside.
  2. Add carrots, celery, onions, and garlic. Place butter in the boiler and let it melt. Add carrots, celery, onions, and garlic. Saute the veggies in the butter over medium heat until the onions are soft and translucent. 
  3. Combine with flour, salt, pepper and thyme. Start to stir in the flour 1 tablespoon at a time. One combined stir in salt, pepper, and thyme
  4. Stir in broth, water, and soy sauce. Add the broth, water, and soy sauce. Mix well so that there are no clumps of flour. Add bay-leaf and bring to a boil.
  5. Add rice and chicken.  Stir in your rice and chicken. Cover and decrease heat to low or medium low. Allow to simmer for 15-20 minutes or until the rice is no longer crunchy.  Remove and toss the bay-leaf. Remove from heat.
  6. Enjoy!

Monday, January 5, 2015

DIY Almond Milk


Almond milk is the ideal milk choice for me and my family. I was initially drawn to almond milk because my children, husband and I are lactose intolerant. Almond milk also contains fewer calories and is easier for your body to digest than cow milk. Initially I was purchasing almond milk from my local grocery store; however I was soon turned off by the amount of preservatives and chemicals found in the milk.  Now being my DIY loving self, I decided to see what it would take to make my own almond milk. I found out it is way easier than I would have dreamed.

At first I started with a recipe I found on the internet, such as the one on http://www.thekitchn.com. However, I quickly tweaked the recipe to yield twice the amount of milk using the same amount of almonds.  I achieved this by using a natural thickening agent called Xanthium gum. This adds no taste and stretches the almond you can use. This drops the cost of making my own almond milk to about $1.50 for 2 quarts or half a gallon. This is half the price I was paying at the grocery store. Making my own almond milk was the healthier and more economical choice for my family.

After the milk is made, I also use the leftover almond pulp to make almond flour. This flour can be used to create cookies, pancake, and a variety of other baked items.
I have included my instructions to make our own almond milk.

Homemade Almond Milk

Makes about 2 quarts (1/2 gallon)

What You Need:

Ingredients
  • 1 cup raw almonds
  • 2 cups water, plus more for soaking
  • 1 tsp vanilla abstract
  • 1/2 tsp Xanthium gum
  • Sweeteners such as; stevia, sugar, agave syrup, honey, dates, or maple syrup, to taste (optional)

Equipment
  • Strainer
  • Blender
  • Measure Cup
  • Strainer
  • Cheese cloth or Fine-mesh nut bag

Instructions:

  1. Soak the almonds overnight or for up to 2 days. Place the almonds in a bowl and cover with about an inch of water. They will plump as they absorb water. Let stand, uncovered, overnight or up to 2 days. The longer the almonds soak, the creamier the almond milk.
  2. Drain and rinse the almonds. Drain the almonds from their soaking water and rinse them thoroughly under cool running water. The almonds should look plump and be a little squishy. 
  3. Add almonds to the blender and add water. Place the almonds in the blender and cover with 8 cups of water.
  4. Sweeten to desired taste.  Add sweetener to taste. I personally like to add 1 tsp of vanilla and 2 Tbs of agave nectar. 
  5. Blend on high speed for about 2 minutes. Blend continuously for two minutes. The almonds should be broken down into a very fine pulp and the water should be white and kinda of frothy.
  6. Strain the almonds. Line the strainer with an opened piece cheese cloth or nut bag, and place over a measuring cup. Pour the almond mixture into the strainer. Use a spatula 
  7. Squeeze the almond milk from the almond pulp. Gather the cheese cloth or nut bag around the almond meal. Lightly squeeze and press on the cheese cloth to extract as much almond milk as possible. Place pulp into a storage container and set aside (If you want to also make almond flour)
  8. Rinse blender. Rinse to remove all of the access almond pulp and milk residue.
  9. Add Xanthium gum. Pour milk back into the rinse blender. Add 1/2 tsp of Xanthium gum. On low speed blend until well combined
  10. Pour into desired container. Pour milk from measuring cup into desire airtight storage container
  11. Refrigerate almond milk. Store the almond milk in the sealed container in the fridge for up to three days.
  12. Make almond flour. Spread almond pulp evenly on a cookie sheet. Bake on ovens lowest setting for about 5 hours, or until almond pulp is completely dry. Let pulp cool. Place in blender or food processor on medium speed until it is ground into a fine meal. Store in fridge in an airtight container.

Friday, January 2, 2015

Falling Short


    Like many other moms, I have a tendency to put to many burdens on my shoulders. Sometimes I put so much on myself, that I feel like I'm going to collapse from the weight. There is a constant voice in my head that is never quite, going over all of the things that I haven't gotten done. I have also always been very critical and have had unrealistic expectations of myself. I constantly feel that I fall short of who I want to be and the things that I want to accomplish.  This morning was no exception. Once again I was feeling so frustrated that I felt as though my head was going to explode and I was fighting back tears. I decided to take a drive by myself to one of my favorite trail heads, just down the street from my house. As I sat there in my car, I started to think about all the blessings in my life and how much my family means to me. I remembered how my baby's face lights up when he sees me, how Alex runs to me when I pick him up from school, how Aaron always seeks the comfort of my lap when he isn't feeling well, and the love that radiates from the eyes of my husband when I smile at him. In these quite moments of thought, it occurred to me, that it doesn't matter how many short comings I see in myself.  Through the eyes of my husband and children, I am enough and I do enough. I have decided that my goal for this New Year to no longer dwell on my shortcomings, but try to see myself through the eyes of my children. I want to learn to truly love myself for who I am.

    I just wanted to share this with you. Just in case you feel as though you aren't enough or that you feel that you do not do enough. That list of tasks can wait. You are enough and you do enough. Try to focus on seeing yourself through the eyes of the people who love you, they see the you that you might be blind to.  


Thursday, January 1, 2015

DIY Pinata

My middle son Alex has been all about the Nick Jr show "Paw Patrol", so it was no surprise to me when he decided that was the theme he wanted for his fourth birthday party. It was not much of a challenge to plan this party, with the help of Nick Jr's website www.nickjr.com. Here they offered tons of free printable downloads, that really made everything easy and very special for my little boy. There was one thing that Alex really wanted to have at his birthday party, a pinata. We had never done a pinata before, so I wasn't really sure what to expect. I can tell you what I didn't expect was a Paw Patrol pinata to cost more that $50. That was when my penny pincher side kicked in and I decided to make one myself.  I spent a grand total of $4 and the pinata was a huge hit. Below are the instructions for you to create your very own pinata.

Supplies you will need
  • A large cardboard box 
  • string
  • a pencil
  • 10 sheets of tissue paper total, 2 different colors (I used red and blue)
  • 2 glue sticks
  • masking tape
  • twine or rope
  • scissors
  • phillips head screw driver 
  • white paper scrapes
  • 1-2 small poster of desired characters -I used one from Nick Jr  http://www.nickjr.com/printables/paw-patrol-poster.jhtml

Lets Get Started


  1. First you want to disassemble your box at the joints
  2. Next you want to draw 2 circle with a diameter of 18". You also want to draw 2 side panels that are about 6"X 36" 
  3. Cut these out


  1. Go ahead and braid your twine, to create a handle to use to hang your pinata
  2. Using your screw driver puncture 2 holes about 4" apart into the middle of one of the side panel pieces
  3. Thread your braided twine trough the holes and knot the ends


  1.  Start attaching the side panel with the handle to one of the circles with small pieces of masking tape secured to the outside.
  2. Next we are going to start securing the second side panel to the circle. We want to over lap the side panels on the inside and secure it with the masking tape. 
  3. Add random pieces of tape all around the outside and inside edges. So that it feels like it is secure. but not so much tape that all of the edges are covered.
  4. Attach the other circle to the side panels using small pieces of tape
  5. Using a glue stick, glue on strips of white paper where the side panels are joined together (I used liquid glue in this picture, however, I've found glue sticks are less messy)


  1. Cut tissue paper into roughly 2" X the length of the tissue paper, then cut the tissue to create a fringe


  1. Then place the pinata on a large bowl, so it is not laying on the table. This way you can turn the bowl and not the pinata when working. 
  2. Glue tissue paper strips of the same color around the handle area using your glue stick
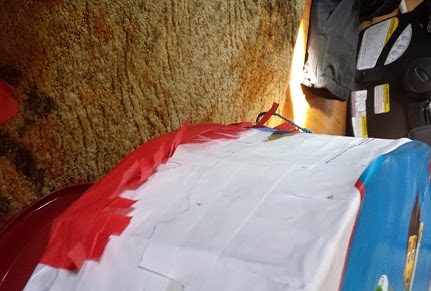
  3. Start gluing and layering the tissue paper, starting with the back edge. I like to stack it 3 to 4 layers of the first color. You want to fringe facing the front of the pinata


  1. Stack and glue the next color about 10 to 12 layers of the second color
  2. Switch back to the first color and layer until you get to the edge of the pinata
  3. Bend the last layer of the first color over the front of the pinata
  4. Using the glue stick, attach your images to the front and back of your pinata (I only used one image for the front of my pinata)


  1. Glue tissue paper strips around your image on the front and back
  2. Since I only had one image, I added tissue paper strips down the back of my pinata, alternating between the red and blue. 


  1. Using your fingers fluff down on the tissue paper to make it look full
  2. Cut a opening in the back of the pinata for candy
  3. fill with candy
  4. enjoy!!!!!