
Supplies you will need
- A large cardboard box
- string
- a pencil
- 10 sheets of tissue paper total, 2 different colors (I used red and blue)
- 2 glue sticks
- masking tape
- twine or rope
- scissors
- phillips head screw driver
- white paper scrapes
- 1-2 small poster of desired characters -I used one from Nick Jr http://www.nickjr.com/printables/paw-patrol-poster.jhtml
Lets Get Started


- First you want to disassemble your box at the joints
- Next you want to draw 2 circle with a diameter of 18". You also want to draw 2 side panels that are about 6"X 36"
- Cut these out
- Go ahead and braid your twine, to create a handle to use to hang your pinata
- Using your screw driver puncture 2 holes about 4" apart into the middle of one of the side panel pieces
- Thread your braided twine trough the holes and knot the ends
- Start attaching the side panel with the handle to one of the circles with small pieces of masking tape secured to the outside.
- Next we are going to start securing the second side panel to the circle. We want to over lap the side panels on the inside and secure it with the masking tape.
- Add random pieces of tape all around the outside and inside edges. So that it feels like it is secure. but not so much tape that all of the edges are covered.
- Attach the other circle to the side panels using small pieces of tape
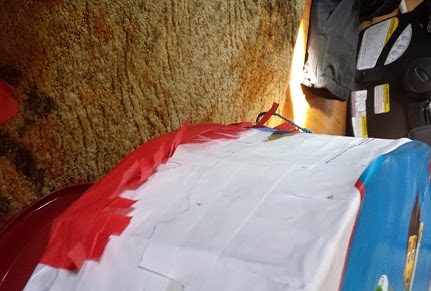
- Using a glue stick, glue on strips of white paper where the side panels are joined together (I used liquid glue in this picture, however, I've found glue sticks are less messy)
- Cut tissue paper into roughly 2" X the length of the tissue paper, then cut the tissue to create a fringe
- Then place the pinata on a large bowl, so it is not laying on the table. This way you can turn the bowl and not the pinata when working.
- Glue tissue paper strips of the same color around the handle area using your glue stick
- Start gluing and layering the tissue paper, starting with the back edge. I like to stack it 3 to 4 layers of the first color. You want to fringe facing the front of the pinata
- Stack and glue the next color about 10 to 12 layers of the second color
- Switch back to the first color and layer until you get to the edge of the pinata
- Bend the last layer of the first color over the front of the pinata
- Using the glue stick, attach your images to the front and back of your pinata (I only used one image for the front of my pinata)


- Glue tissue paper strips around your image on the front and back
- Since I only had one image, I added tissue paper strips down the back of my pinata, alternating between the red and blue.

- Using your fingers fluff down on the tissue paper to make it look full
- Cut a opening in the back of the pinata for candy
- fill with candy
- enjoy!!!!!

thank you. I may try this if I have time. :)
ReplyDeleteHOw many bags/lbs of candy did you need to fill it?
ReplyDeleteLOVE THIS!! Thank you! :-)
ReplyDeleteLOOKING GOOD
ReplyDelete